I have an air-print enabled printer and I am unable to connect it. How to add printer on Mac OS Sierra?
Sometimes users ask How to add printer on Mac OS Sierra. For this issue there are many method to add printer depending on the type of printer you have bought. Mac OS uses Air-Print by default to connect to most popular printers and doesn’t require additional printer software. With Air-Print, you can print to an Air-Print-enabled printer over a WiFi, Ethernet, or USB connection. If your printer is Air-print-enabled, it’s compatible with Mac OS. If your printer isn’t Air Print-enabled, you can make sure it’s compatible with Mac OS from the article Printer and scanner software available for download.
Connect a USB printer to add printer on Mac OS Sierra
You can add printer on Mac OS Sierra. For most USB printers, all you have to do is to update your software and then connect the printer to your Mac. If necessary, Mac OS automatically detects the printer and downloads any necessary software. For other printers, you may have to complete a few steps to add the printer.
- Update software: Choose Apple menu and click on App Store, click Updates, then install any software updates listed.
- Prepare printer: Use the instructions that came with your printer to unpack the printer, install ink or toner, and add paper. Turn on the printer and make sure it’s not displaying any errors.
- Connect printer: Connect the USB cable to your Mac. If you see a message prompting you to download new software, make sure to download and install it.
Note: If your Mac has a single USB-C port, use a multi port adapter. Connect the printer, then connect a USB-C cable to a power supply to prolong the battery life of your Mac. For more information about USB-C click here.
Add a WiFi or network printer
If your Mac and printer are already connected to the same WiFi network, choose File and select Print
Now click the Printer pop-up menu and choose Nearby Printers or Printer & Scanner preferences
Then choose your printer. If your printer isn’t available, you can add it. Follow the same steps given above for enabling WiFi printer also.
Note: Make sure your Mac and printer both are on same WiFi network.
And for more information, you may click here.
Add a Bluetooth printer
If your Mac has Bluetooth installed, or you are using a USB Bluetooth adapter, you can print wireless to a Bluetooth enabled printer.
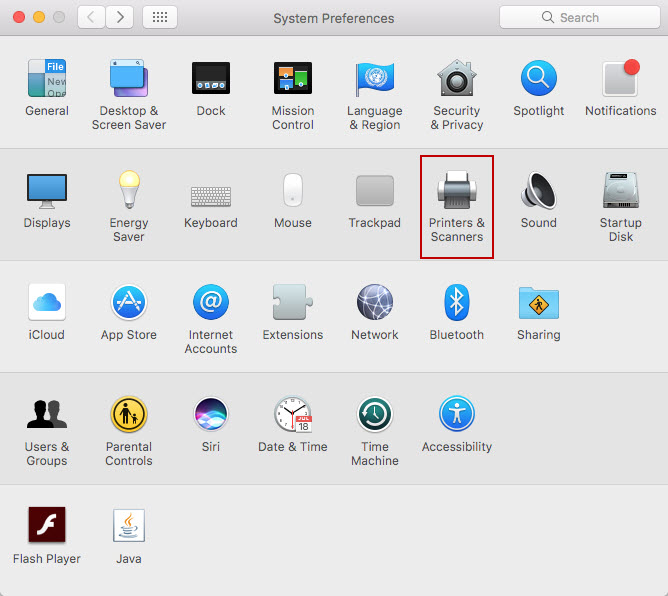
- Updating the software: Choose Apple menu and click App Store. And click Updates and then install any software updates listed.Note: If you have an Air Print printer, you don’t need to check for software updates.2. Prepare your printer: Unpack the printer, install ink or toner, and add paper (see instructions). Turn on the printer and make sure it’s on ready to print option.3. Connect your printer: Follow the instructions that came with your printer to make sure it’s ready to connect via Bluetooth.4. Pairing your Bluetooth printer with your Mac: Click the Apple menu and select System Preferences. Now click on Bluetooth. Then select the device you want from the list, then click Pair. If you are prompted on the device, click Accept.5. Add your Bluetooth printer to your printer list: Click on Apple menu and then go to System Preferences, then click Printers & Scanners. Click the Add + button , then click Default. Select the printer in the Printers list, then click Add.Note: Make sure you have the latest Bluetooth driver for the printer installed.
Even if you face the issue of How to add printer on Mac OS Sierra, then you may contact us.
