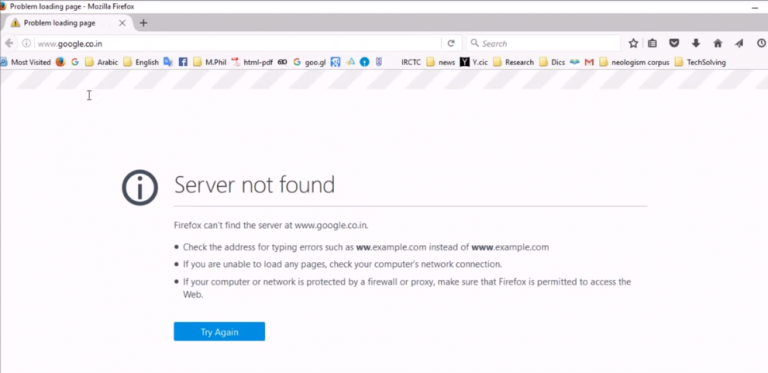
I am unable to connect to WiFi. It is showing server not found error. I have Windows 10 in my PC. How can I sort out the issue Unable to connect WiFi in windows 10?
Some users may face the issue Unable to connect WiFi in windows 10, due to un-updated wireless driver. To sort out this issue, here are 2 best and simple methods:-
Method 1: – Update Wireless Driver to fix Unable to connect WiFi in windows 10: –
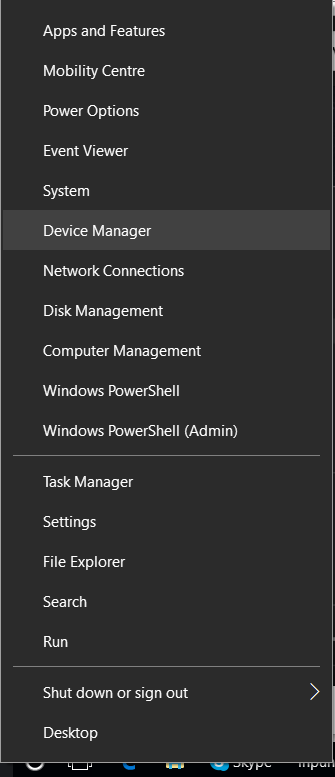
- First of all, right click on Windows Start button. And select Device Manager from the list.
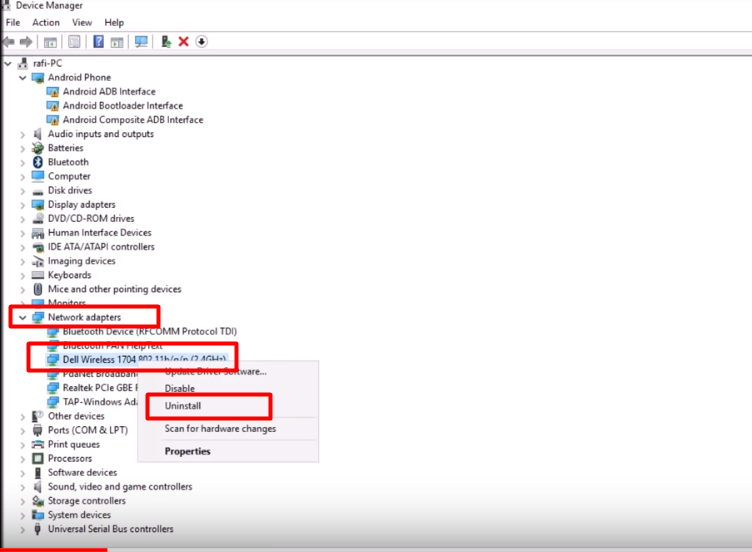
2. Now maximize the device manager window and select Network Adapter. Expand it and find your device’s wireless connection. In the below picture it is Dell wireless 1704. Right click on it and select Uninstall.
 3. Now it will show a pop up giving warning as shown in the picture. Click on OK.
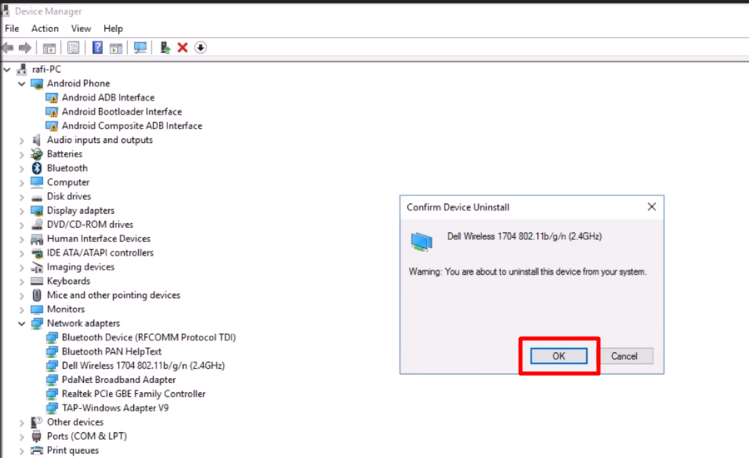
Note: – Sometimes it gives a checkbox, asking to delete network adapters. Don’t tick it as it will delete everything related to wireless connection files.
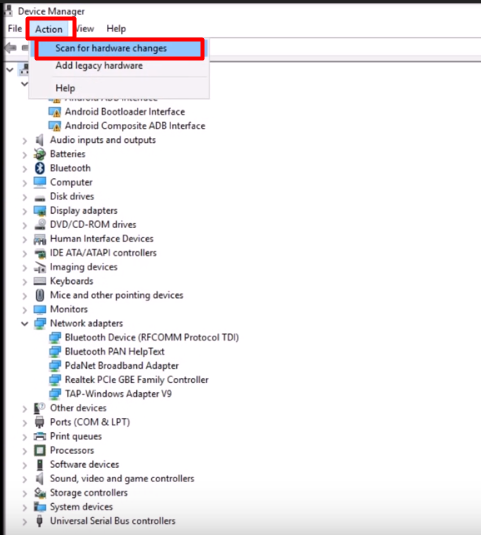
4. Now click on Action and select Scan for hardware Changes. It will show your wireless device driver name that we have uninstalled earlier.
Note: – If the name of driver is not shown while from first scan, do it again.
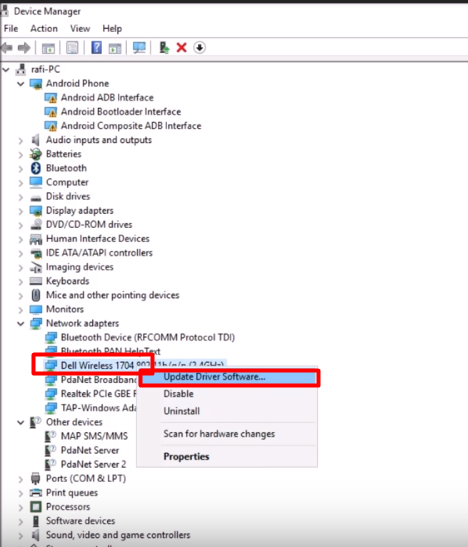
5. Now click on your device adapter name i.e. Dell Wireless 17o4 in this picture. Right click on it and click on Update Driver Software.
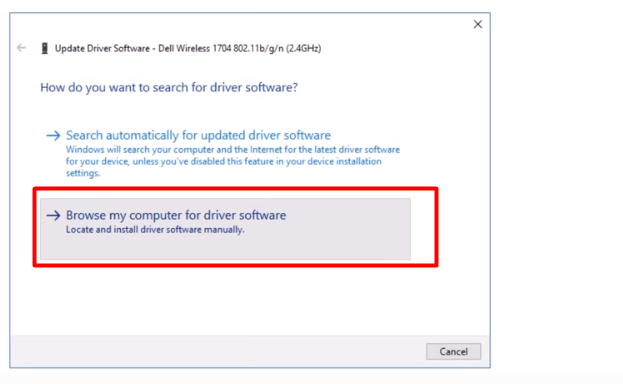
6. Select browse my computer for driver software.
 7. Furthermore, click on Let me pick from a list of device drivers on my computer.

8. Tick on checkbox of Show compatible hardware if it is unchecked. And select any one of the given device drivers.

Now wait for a minute till the process gets completed. It will show you a message like you have successfully completed the installation.
If this method does not work for you, proceed for the 2nd method.
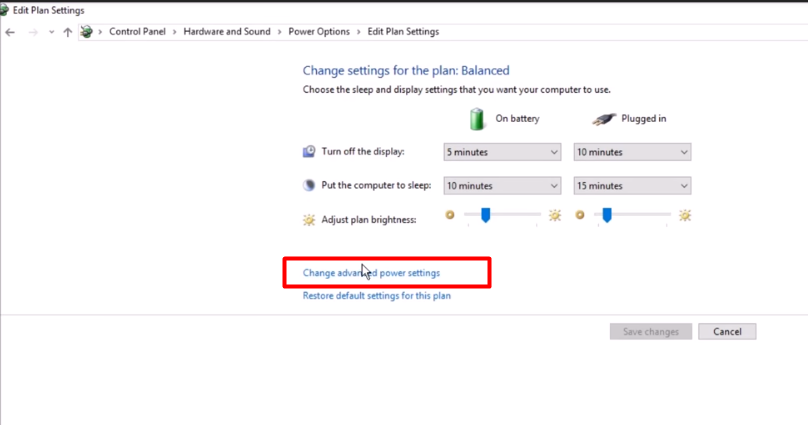
Method 2: – Power Saving Settings to fix Unable to connect WiFi in windows 10: –
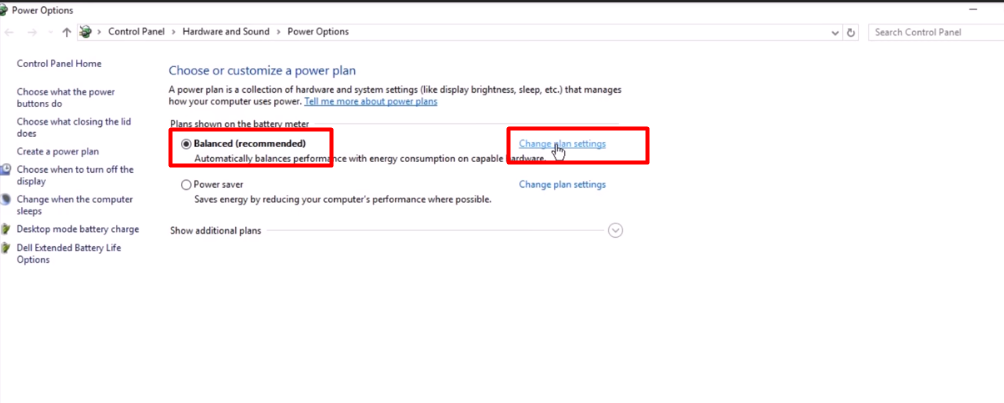
1. First of all, right click on start button and select Power Options.

2.Click on Balanced(recommended). And then click Change Plan settings of Balanced tab.
3.Now again click on Change advanced power settings.
4. Now expend Wireless adapter settings and then select power saving mode. There it will show 2 options: on battery and plugged in. Select Maximum performance in both.

5. Finally, press OK. This will sort out your issue to a great extent.
If the issue: Unable to connect WiFi in windows 10 still persists, you may contact us.
1 comment
good information !! you had explained it nicely!