
How to Fix Windows 11 Update Problem
Here, we will try to fix Windows 11 Update Problems in Windows. It is the latest version by Microsoft for its users launched in late 2021. It is free to upgrade Windows 11 from Windows 10 for the devices that meet the certain requirements for Windows 11. Various new features has been added to Windows 11 outshining the Windows 10. Some of the major variation one can easily notice are position of the Start Menu, the replacement of its live tiles and even a separate widget panel within taskbar.
Fix Windows 11 Update Problem
Most of the users are facing problem while updating Windows 11. Microsoft has also confirmed that Windows 11 is causing issues during update process. The update is essential to keep your PC safe and secure. You need to fix the issues that you might be facing while update of Window 11.
We will discuss some of the most basic errors and how to solve them while updating Windows 11. Sometime, the issues get resolved easily by just restarting the window. The update will go on only when the PC fulfills the hardware requirements. When you decide to get the latest updates to keep your device securely and run smoothly, you might face trouble. Through this article, we will help you to fix Windows 11 Update problem and troubleshoot some common errors with your Windows 11 update.
Steps to fix Windows 11 update problem
Turn on your PC and make sure that you PC is connected to internet.
Steps:
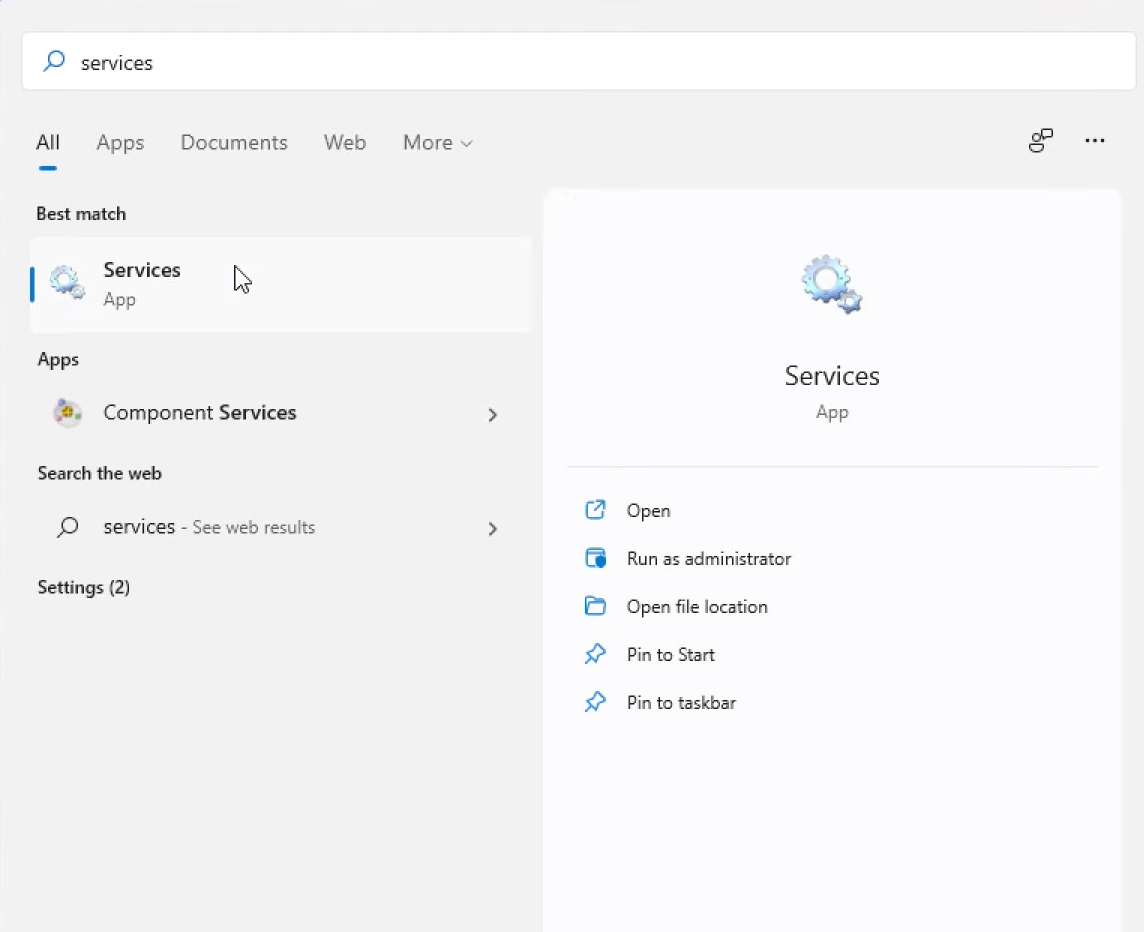
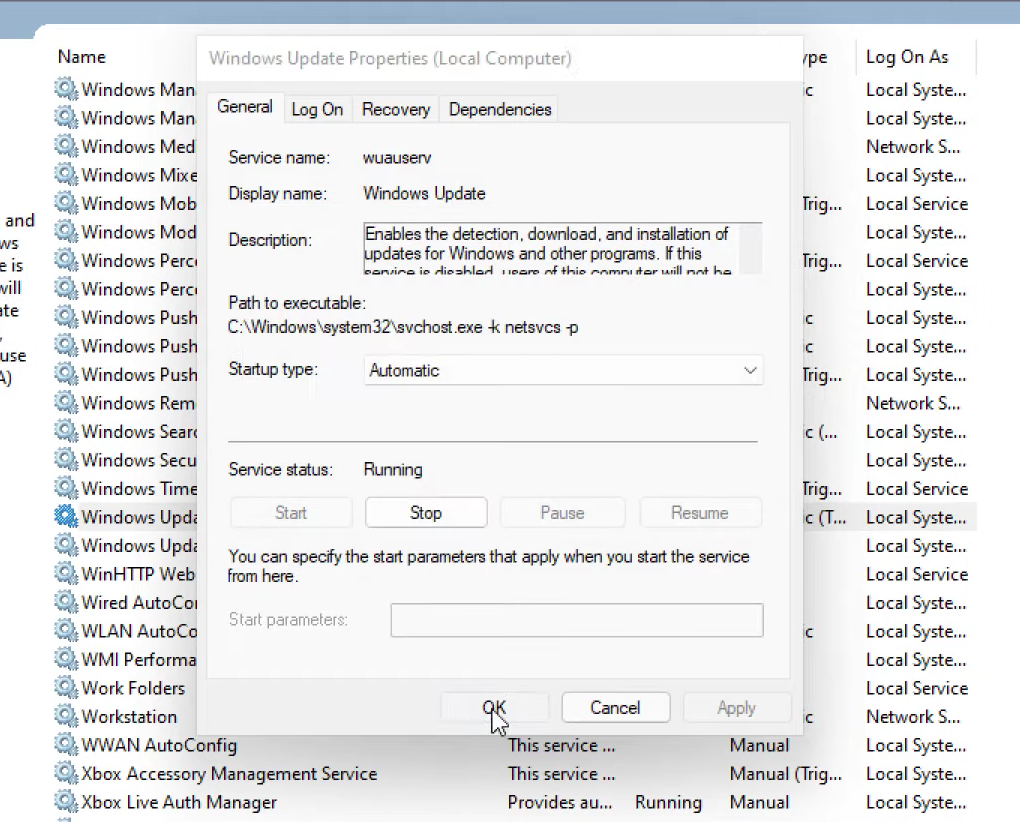
- Click on the Search option in the taskbar and type Services.
- Open the Services and on the next window search windows update.
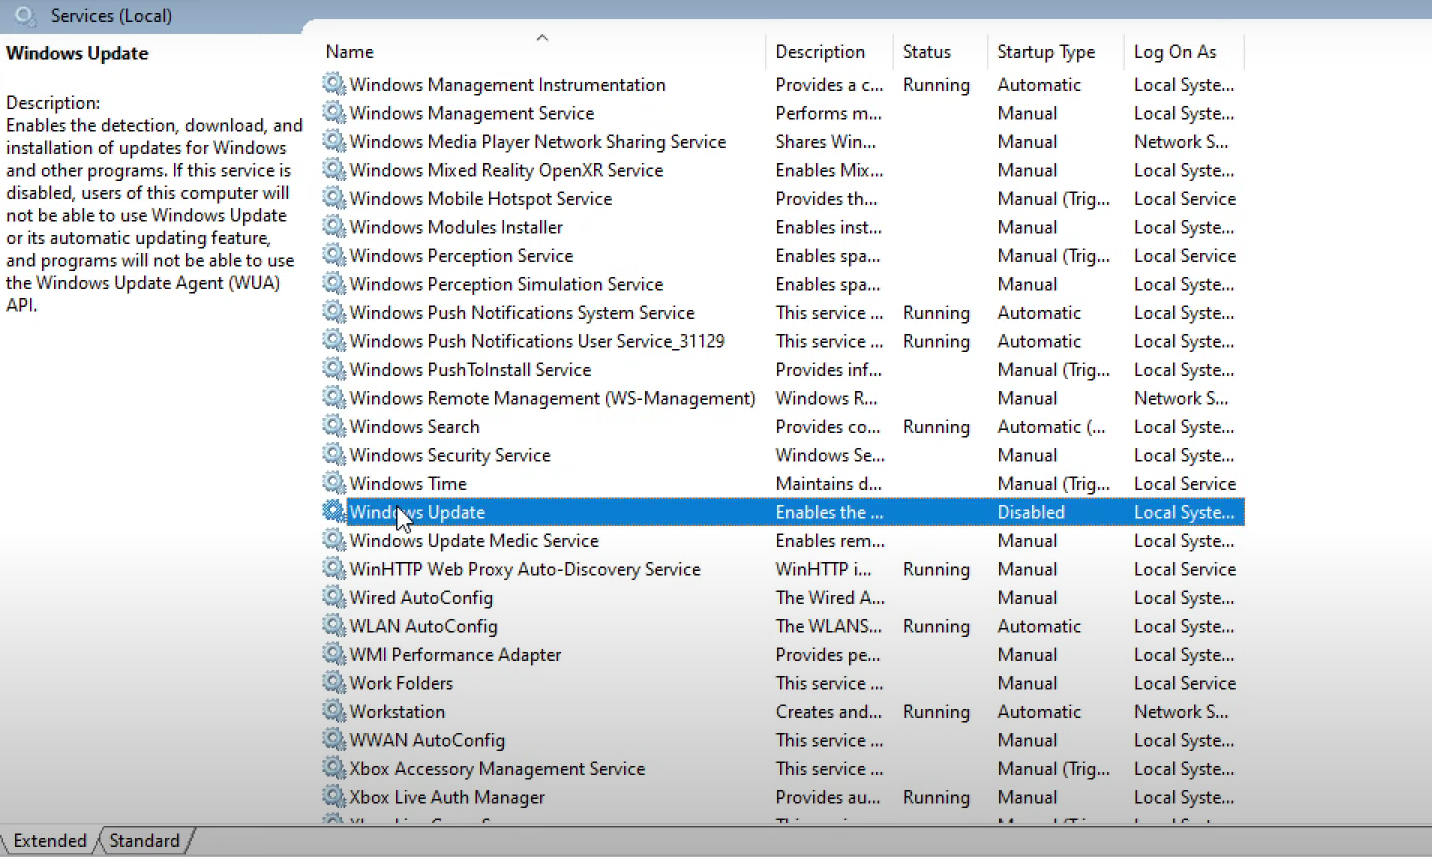
- Now, press Right click on the Windows Update. Then Select properties option.

- Now, click on the select startup type as automatic.
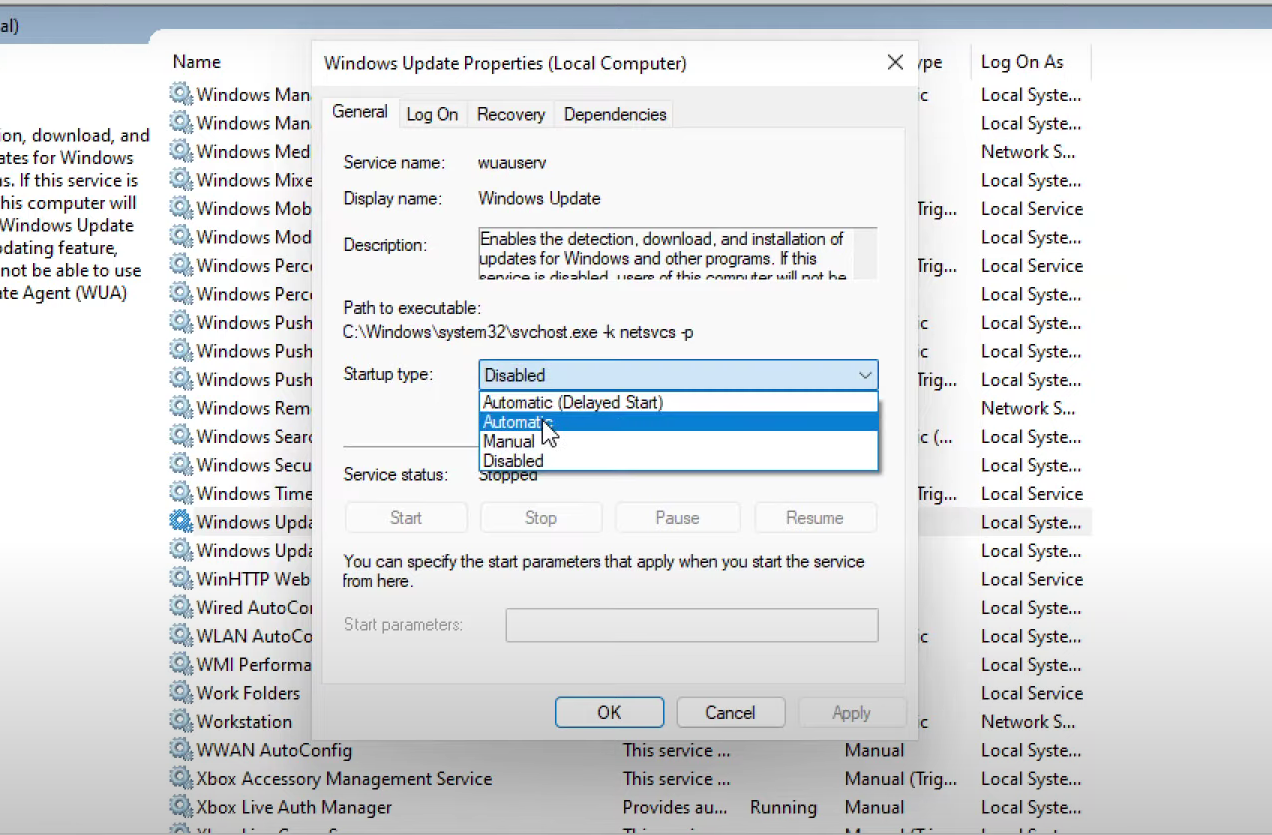
- Click on apply.
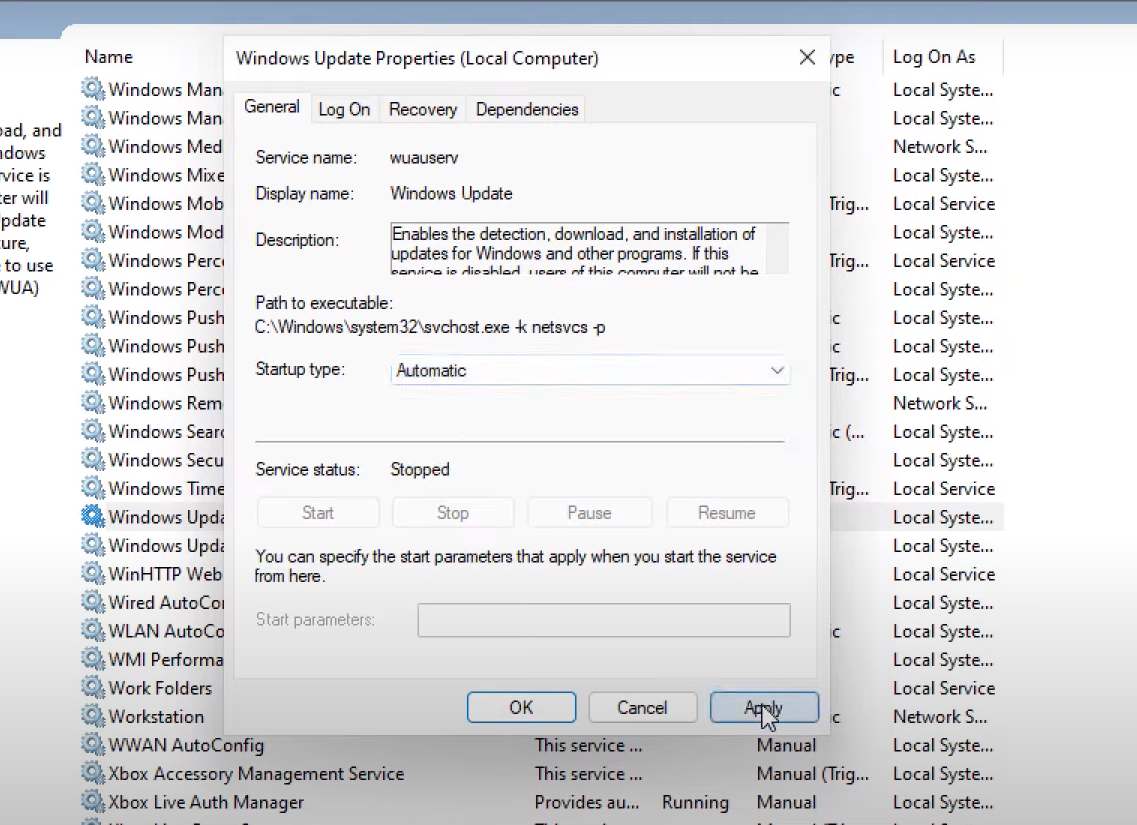
- Then on the next step you need to click on start as shown in the image below.

- Click on Ok and close this window.
The next step is very essential.
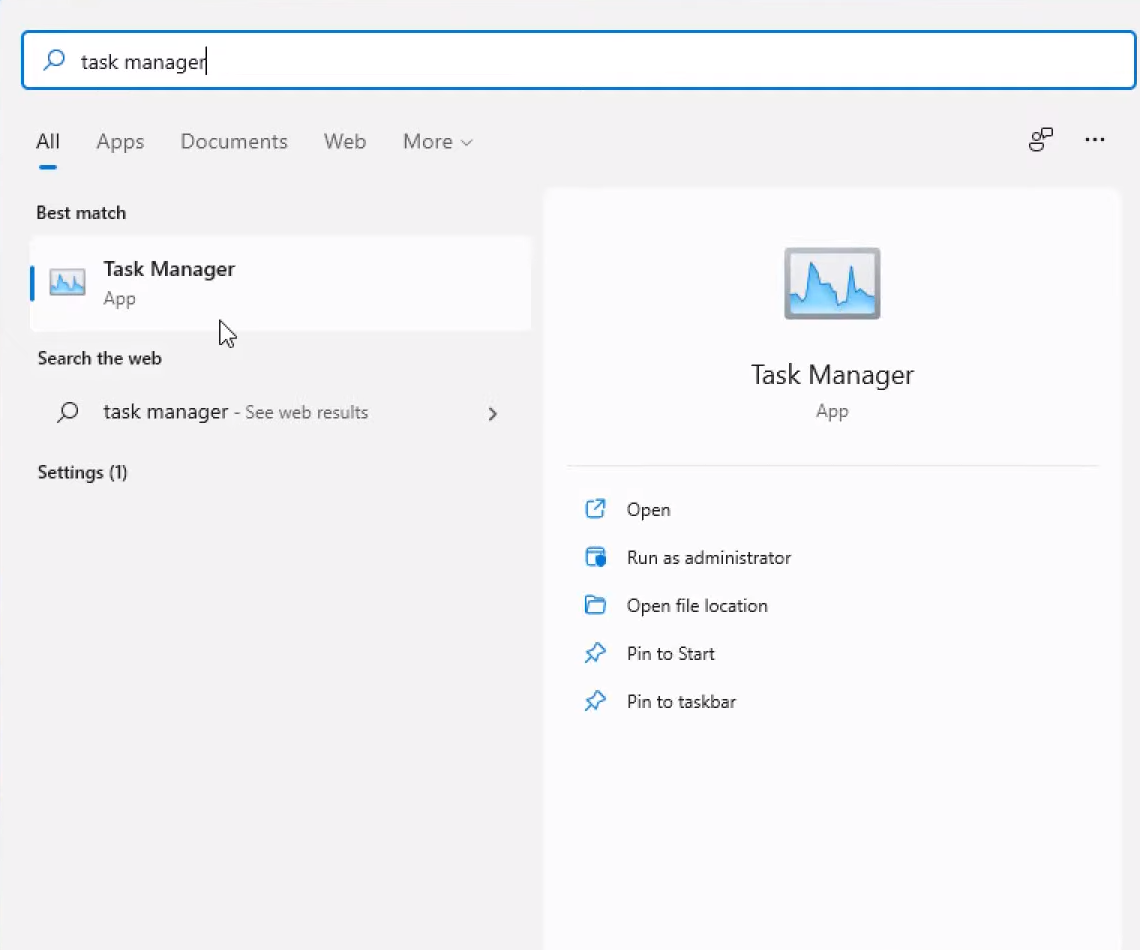
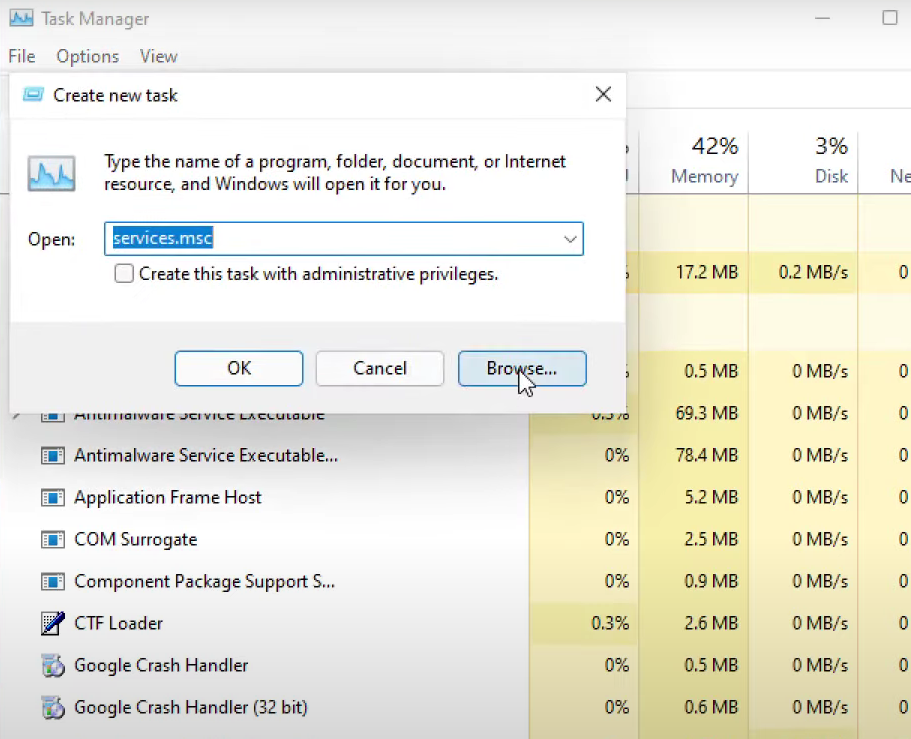
- Click in search option again in the taskbar. Now search task manager.
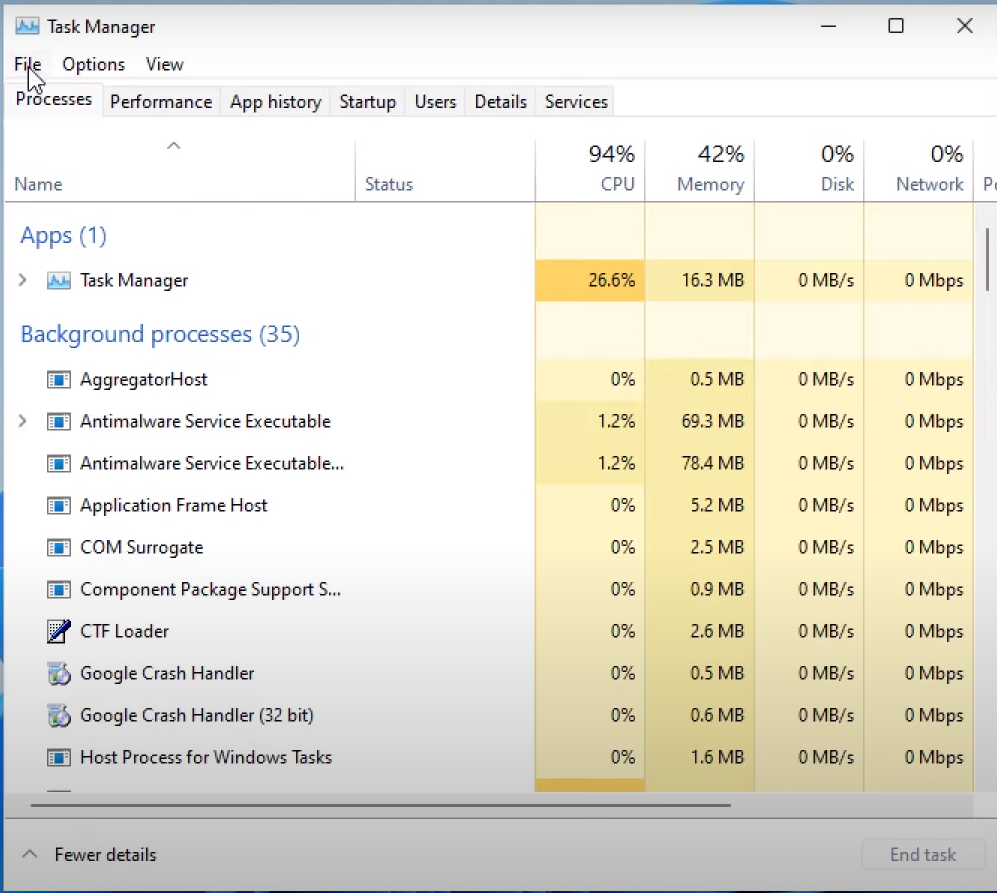
- Open task bar and click on the File option on the top left corner.
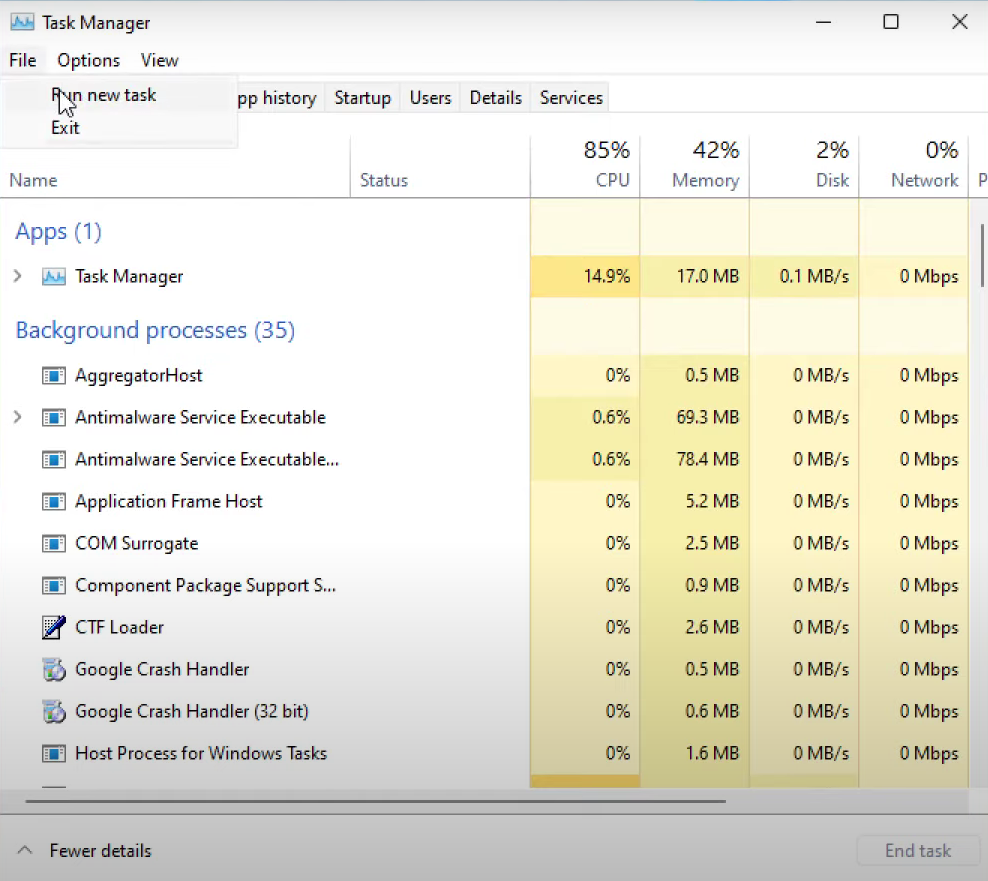
- Then press on run new task.
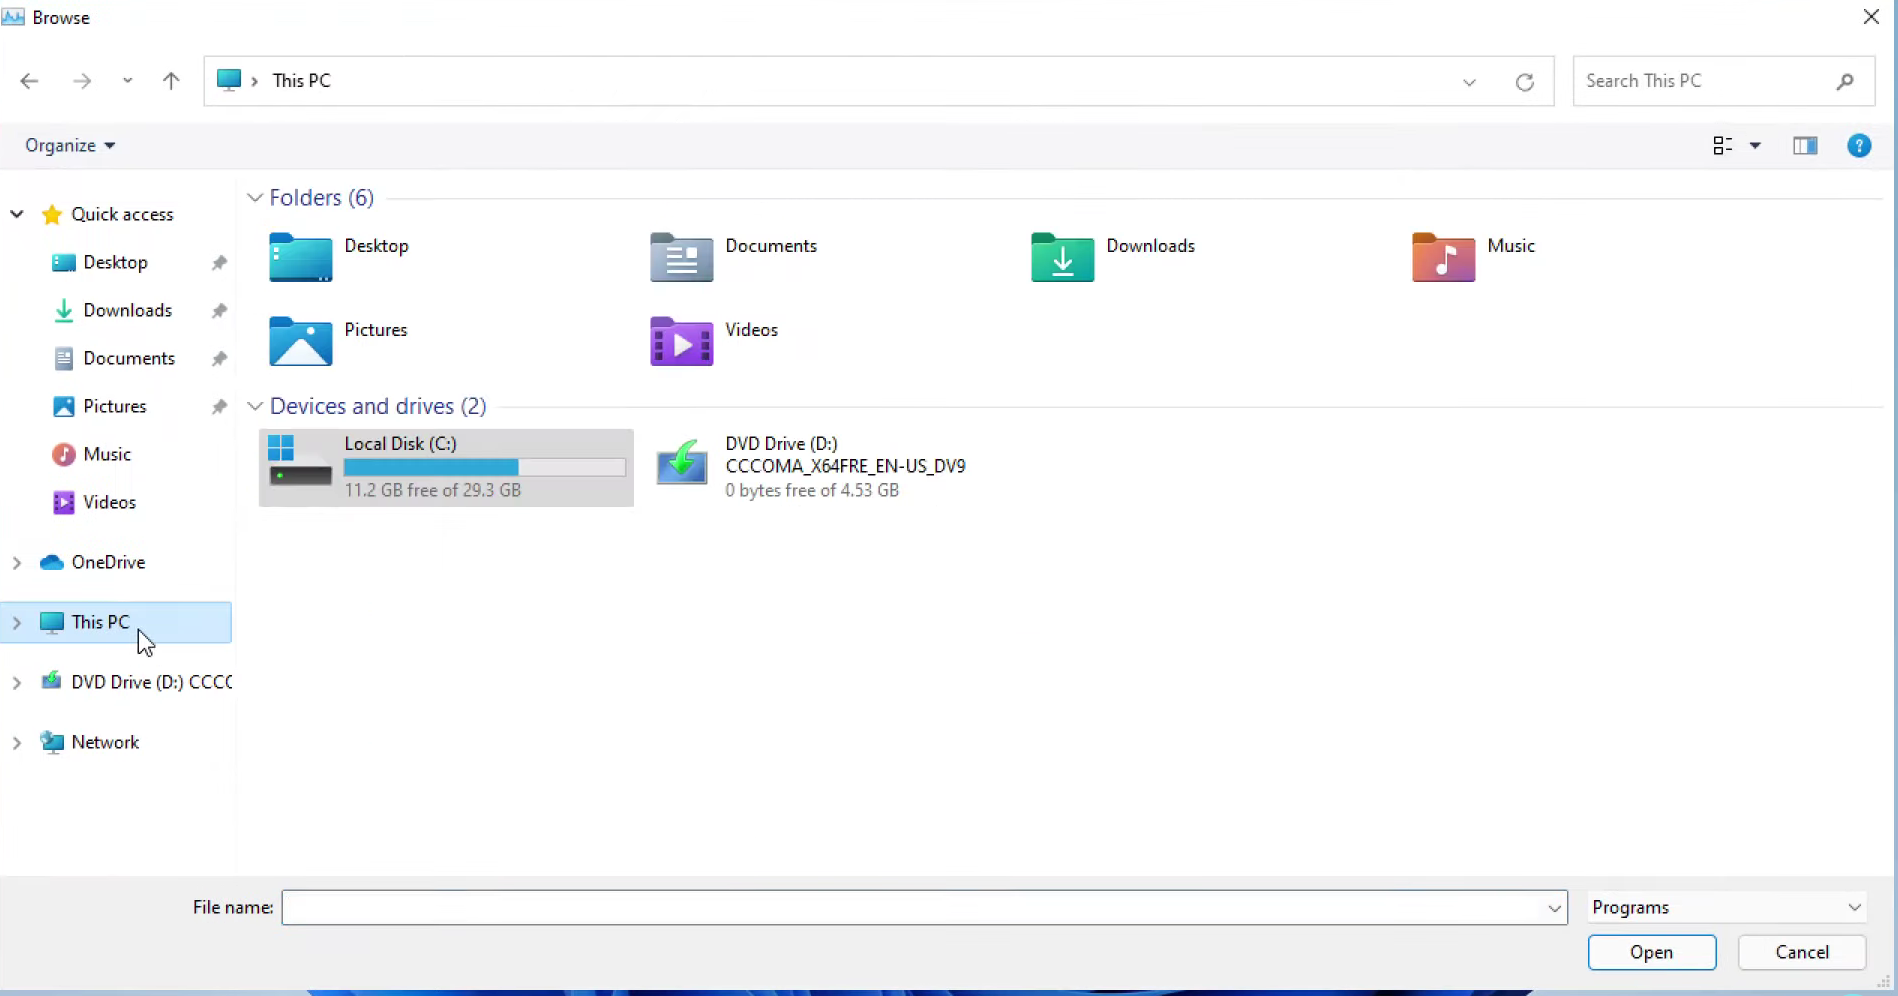
- On the next window, select browse option.
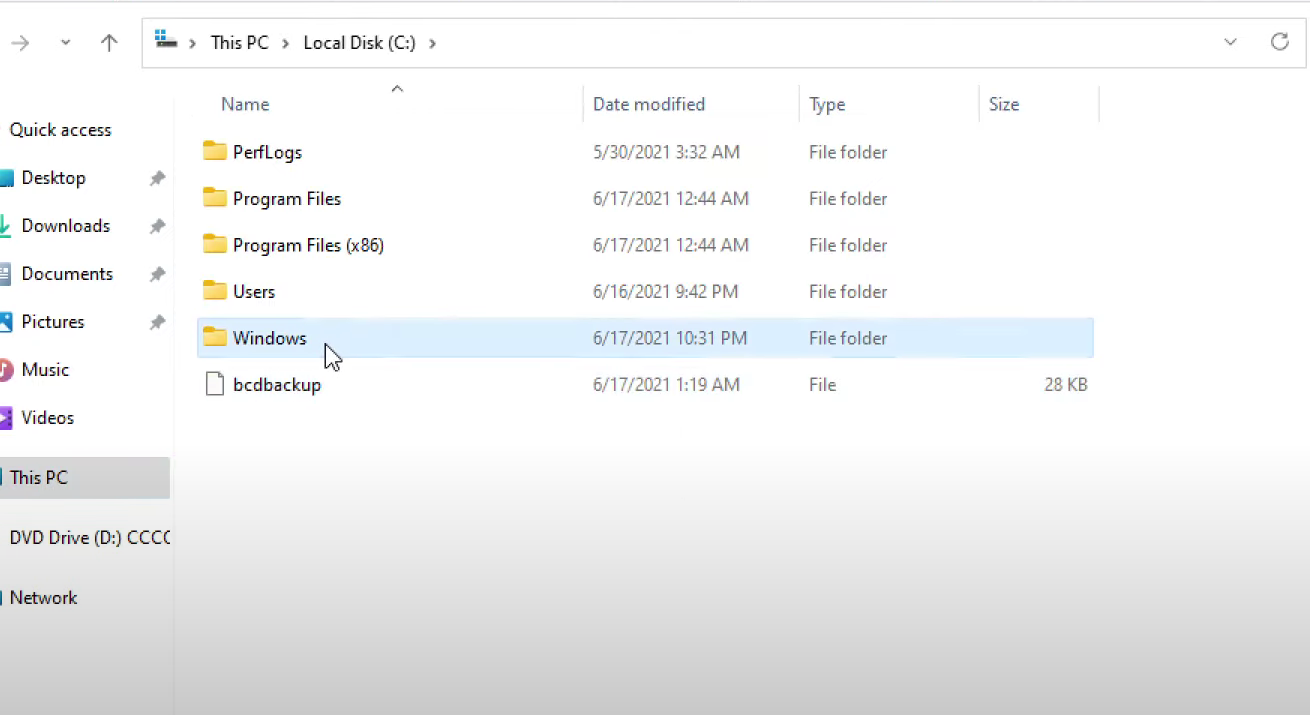
- A new window will appear on your screen, i.e, File Explorer. Click on the This PC.
- Now open Local Drive C. Click on the Windows folder.
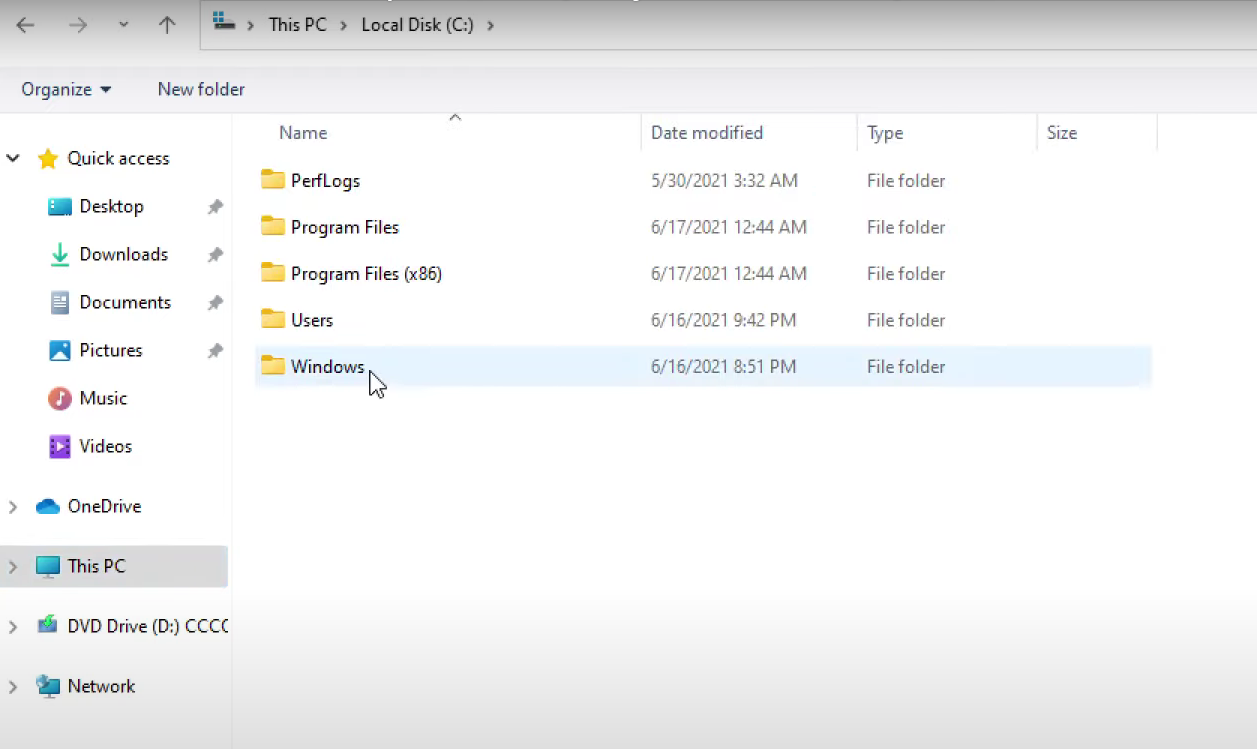
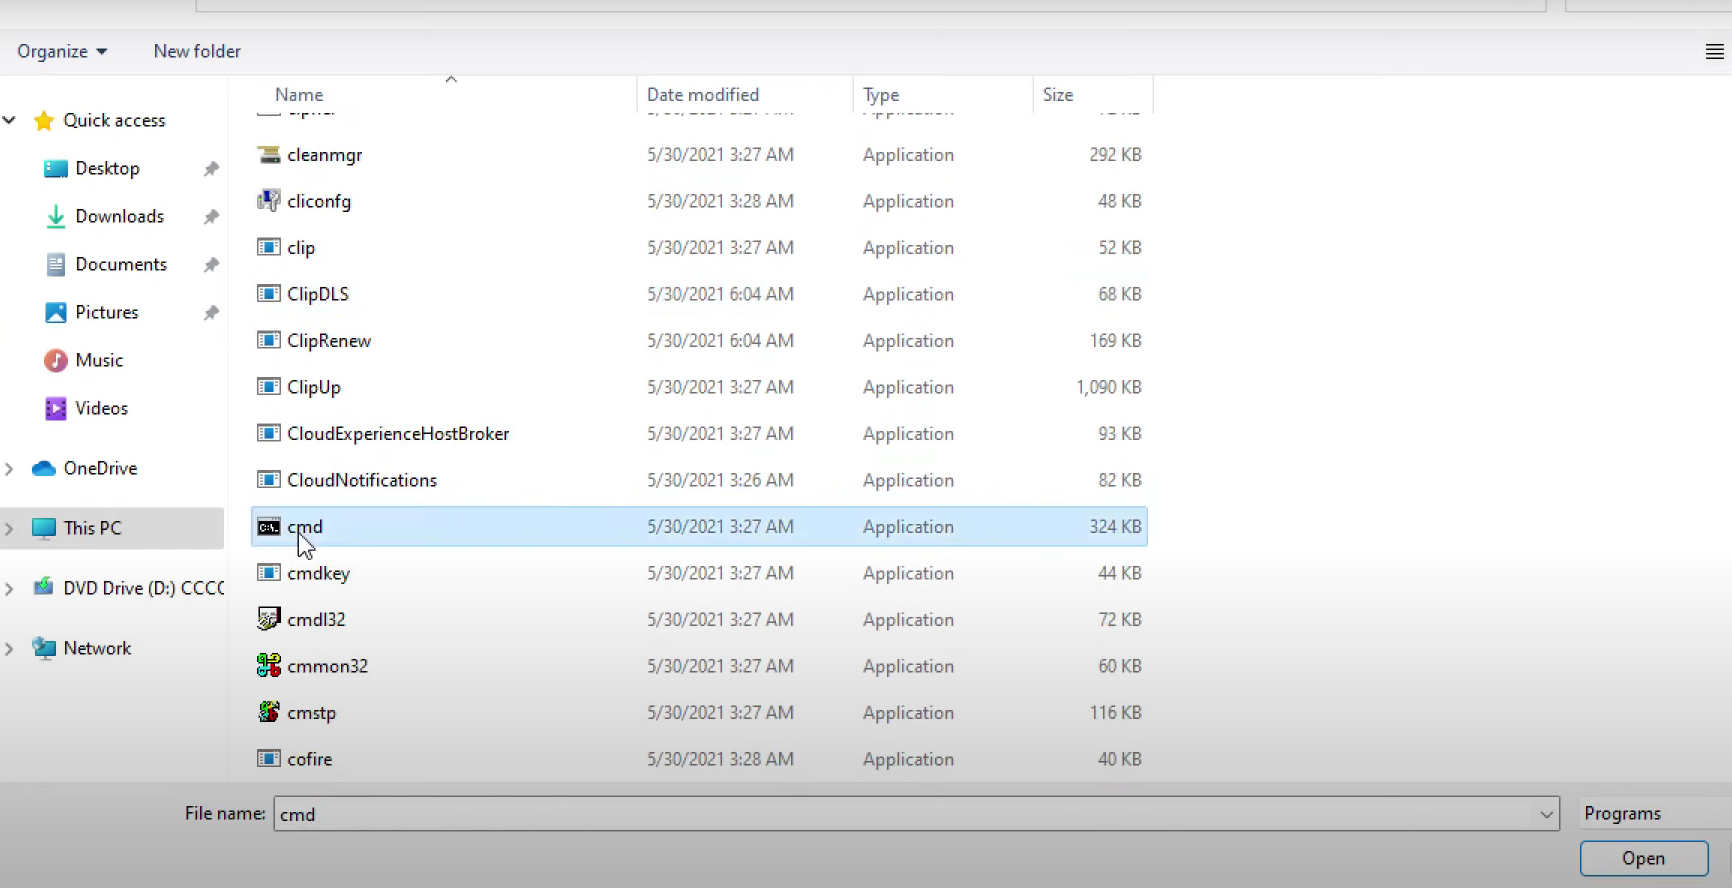
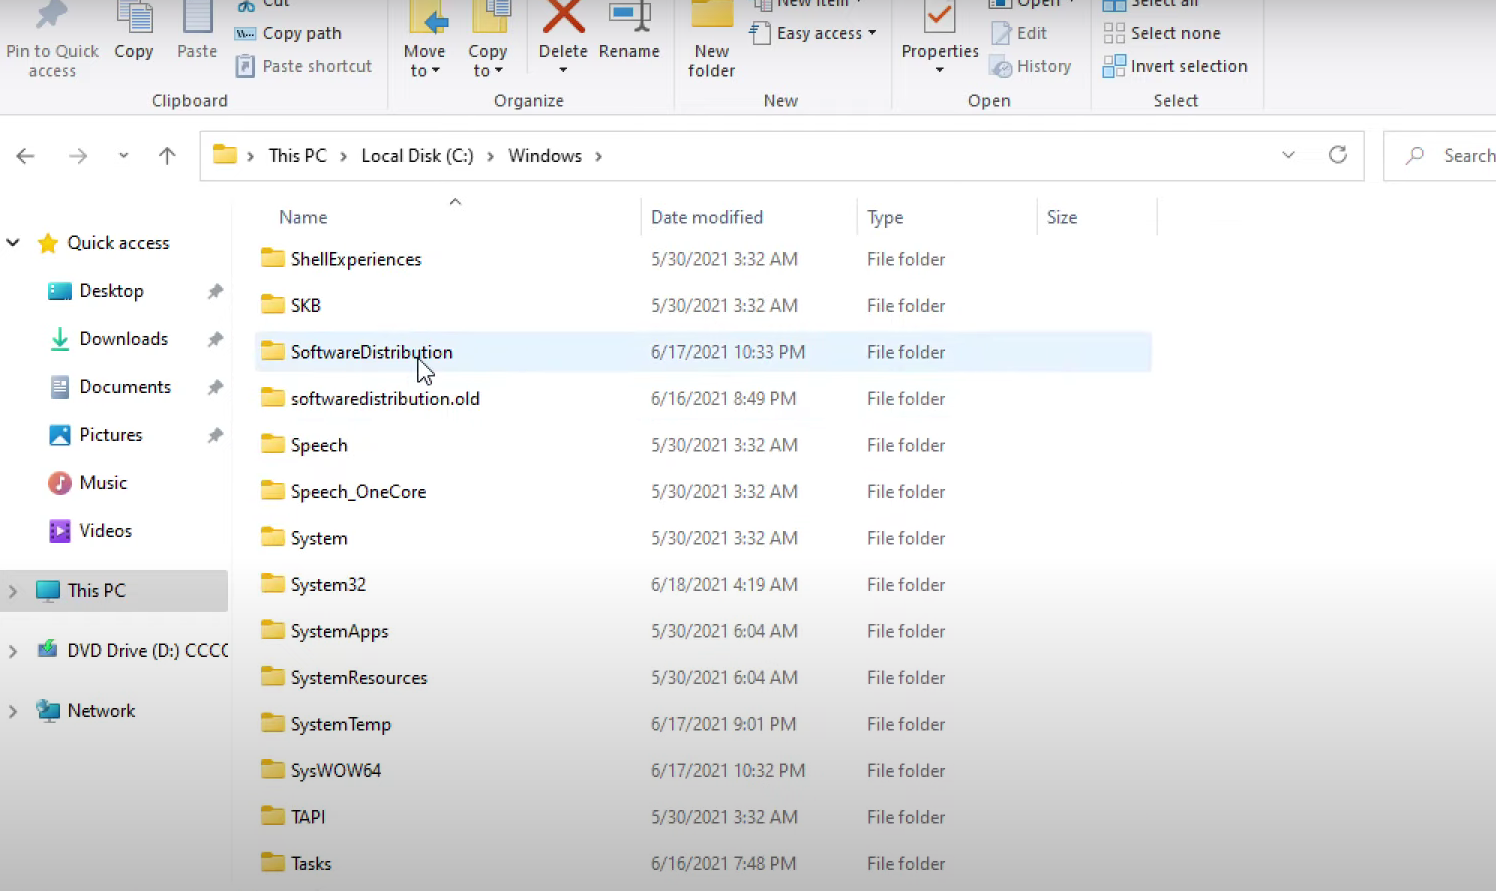
- Then search for System32 folder.
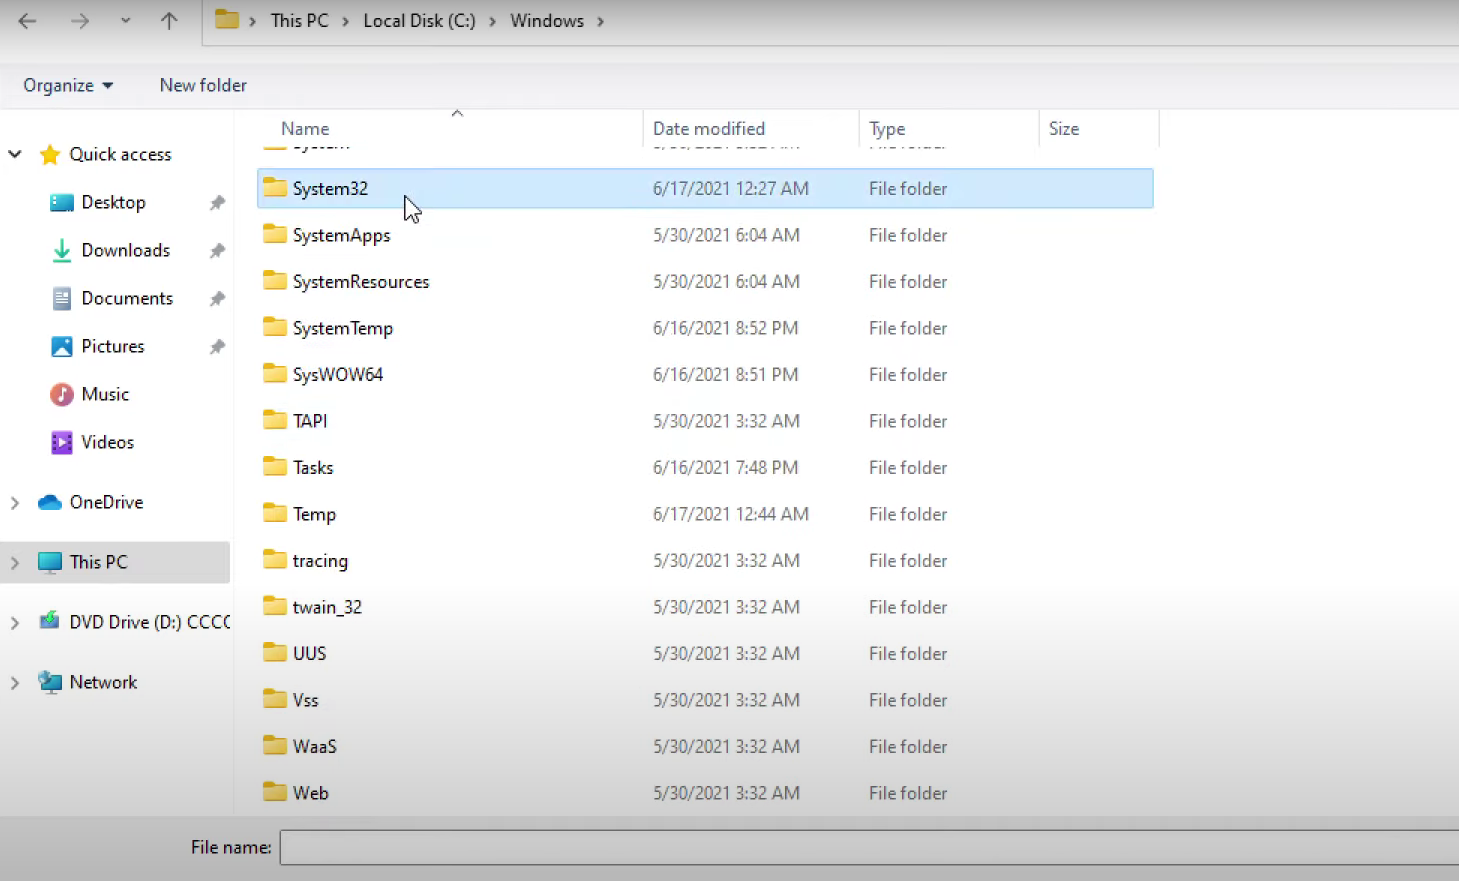
- Open it. Then search the cmd file.
- Now type ‘–update’ here as shown in the image.
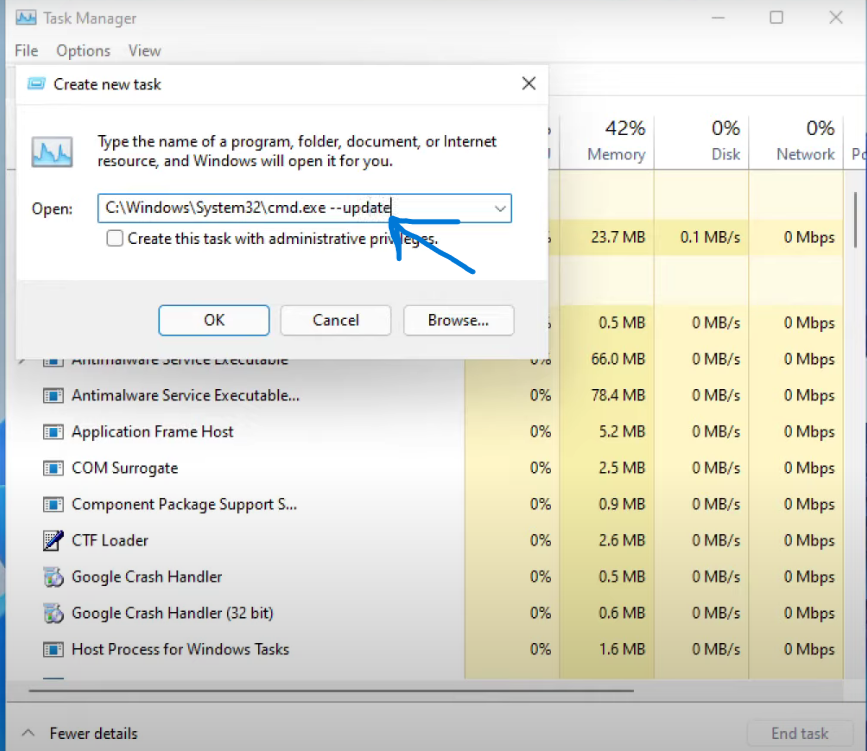
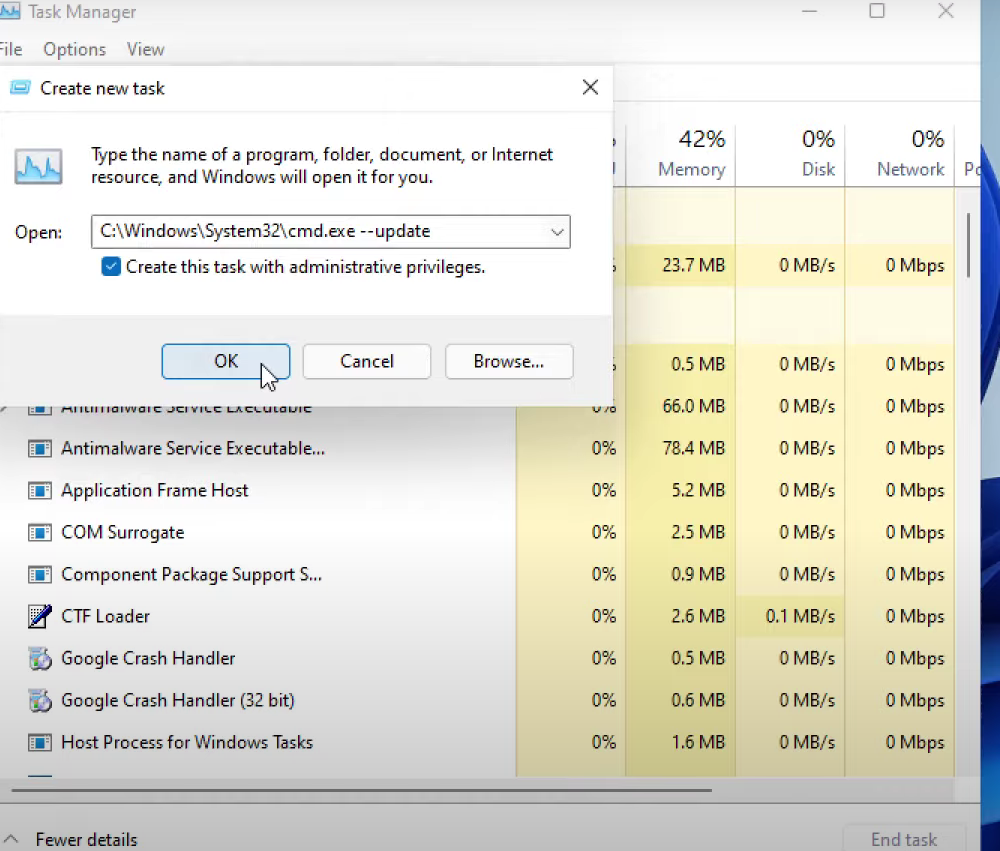
- Tick on the below option and click on OK.
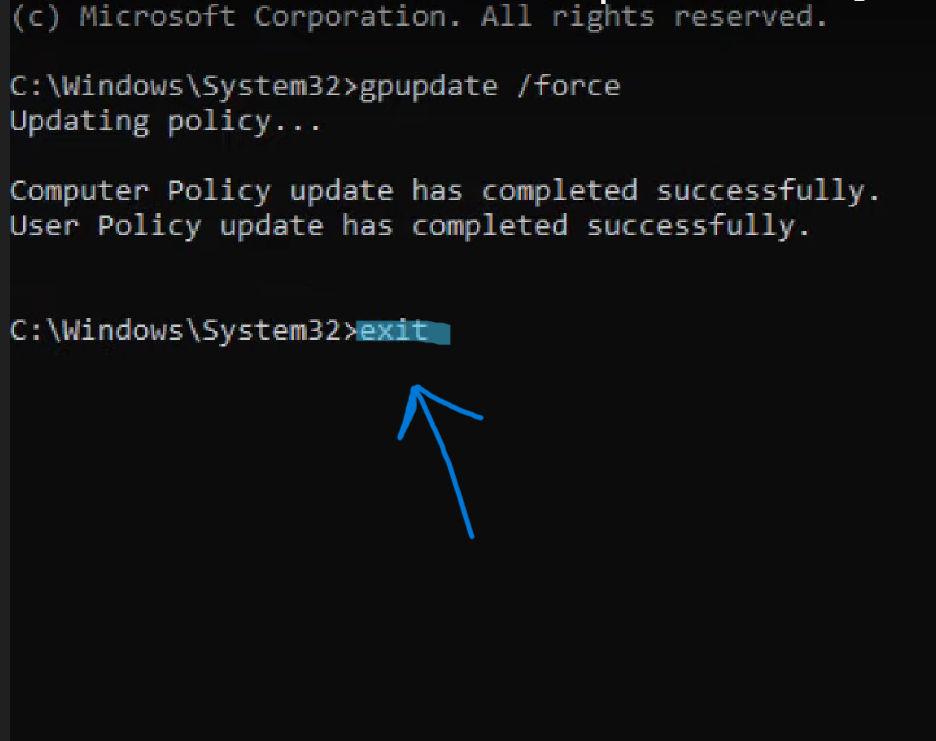
- A new window will get opened. Then type gpupdate /force and then hit enter.
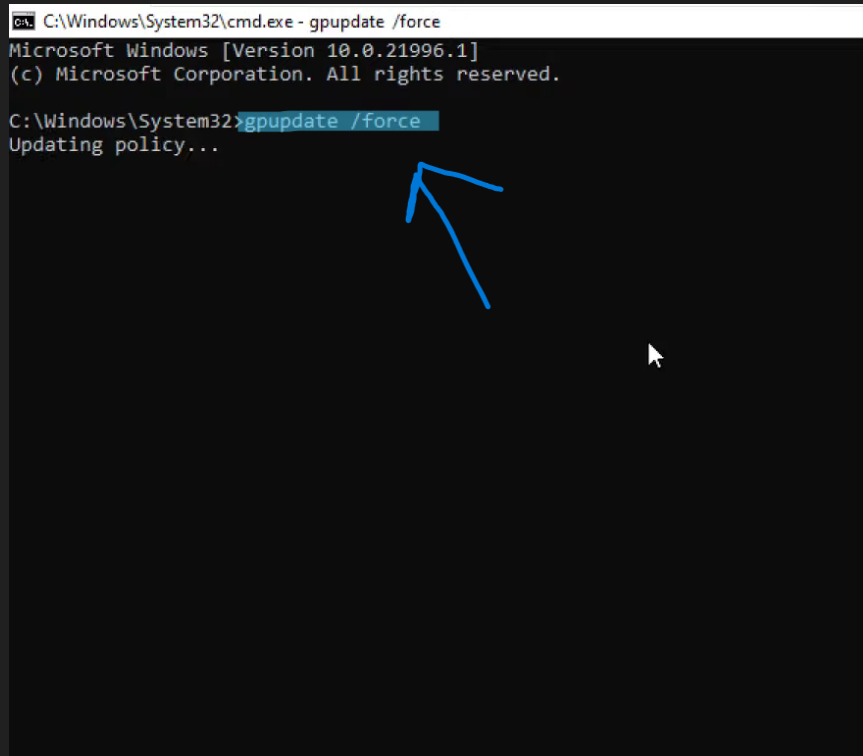
- Then type exit to close the command prompt.
Now, follow these steps.
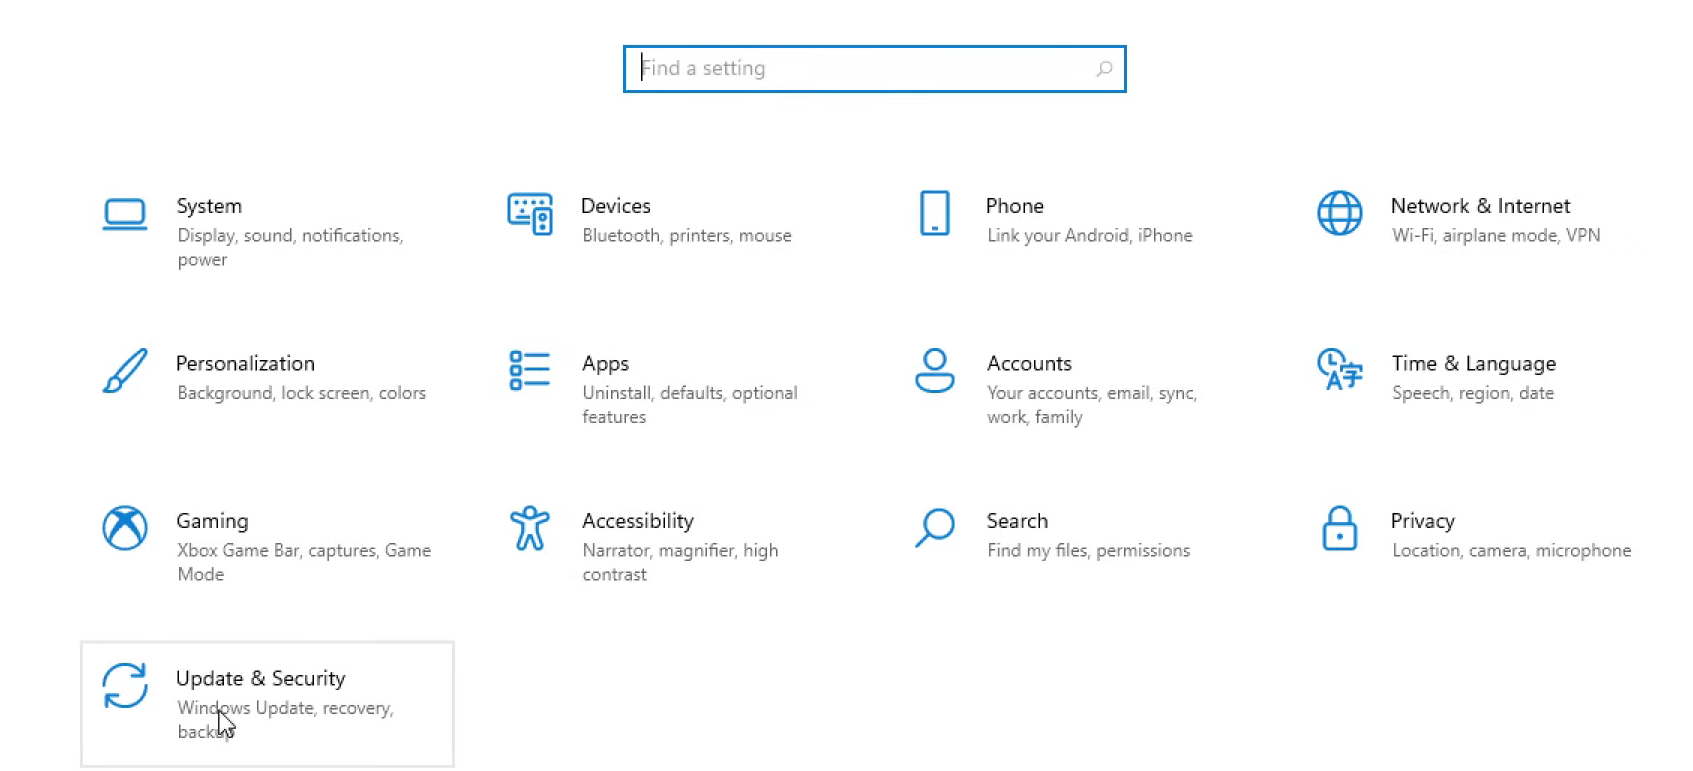
- Open Settings and then on the next window click on Update And Security.
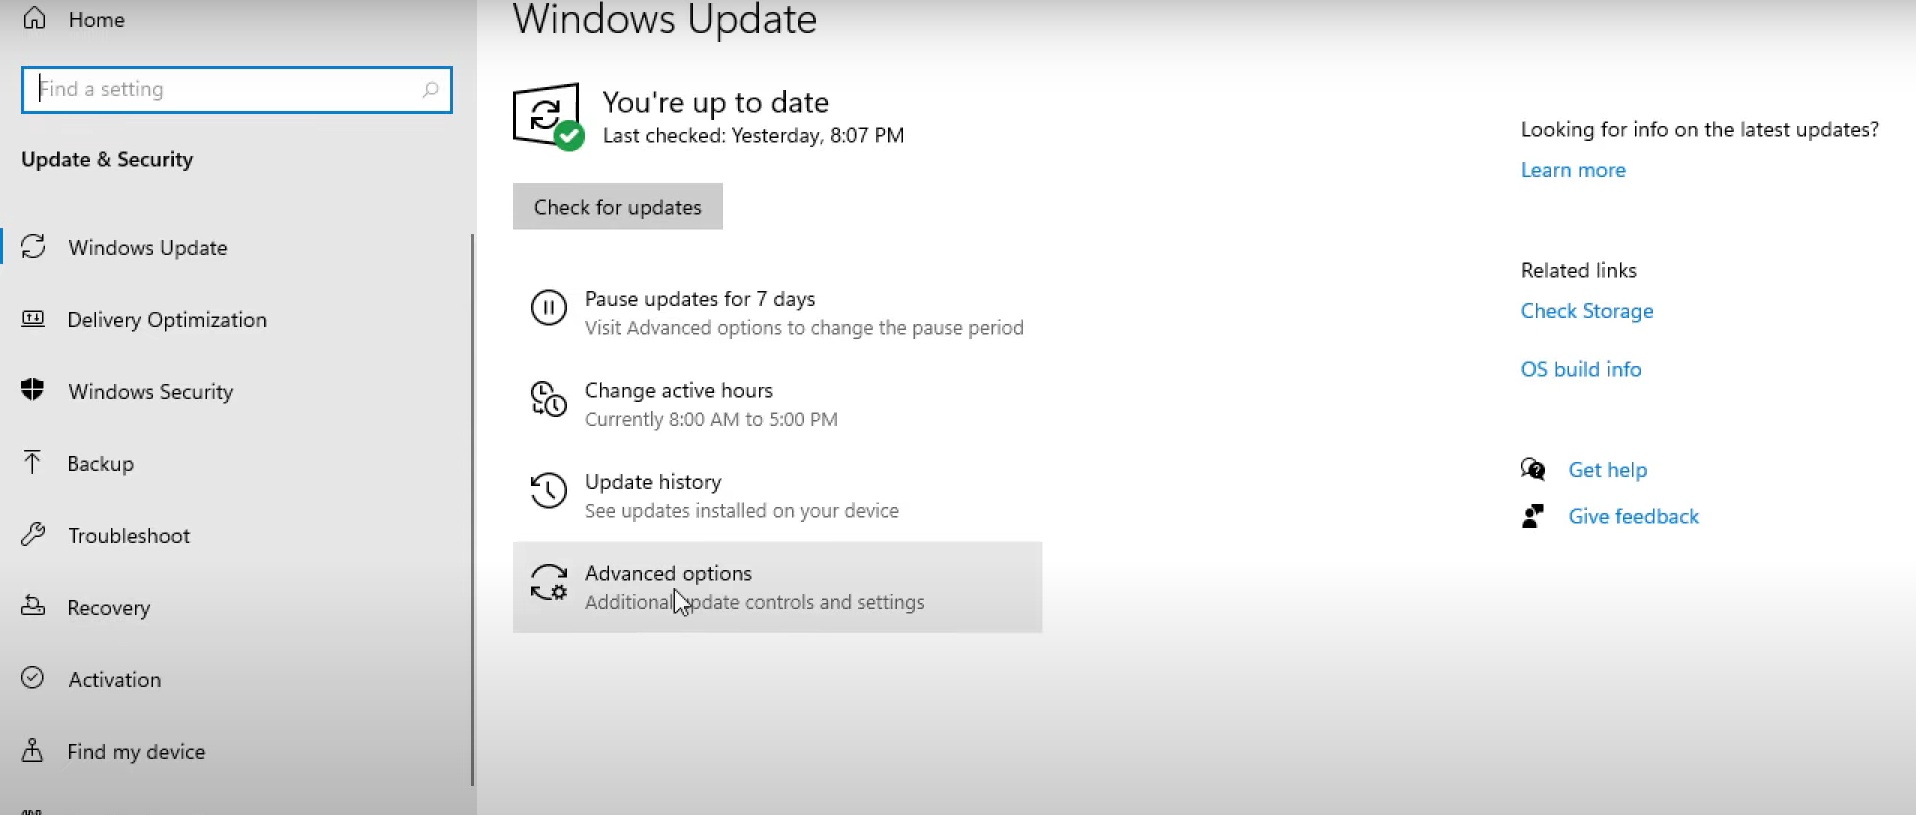
- Then Click on Advanced Options.
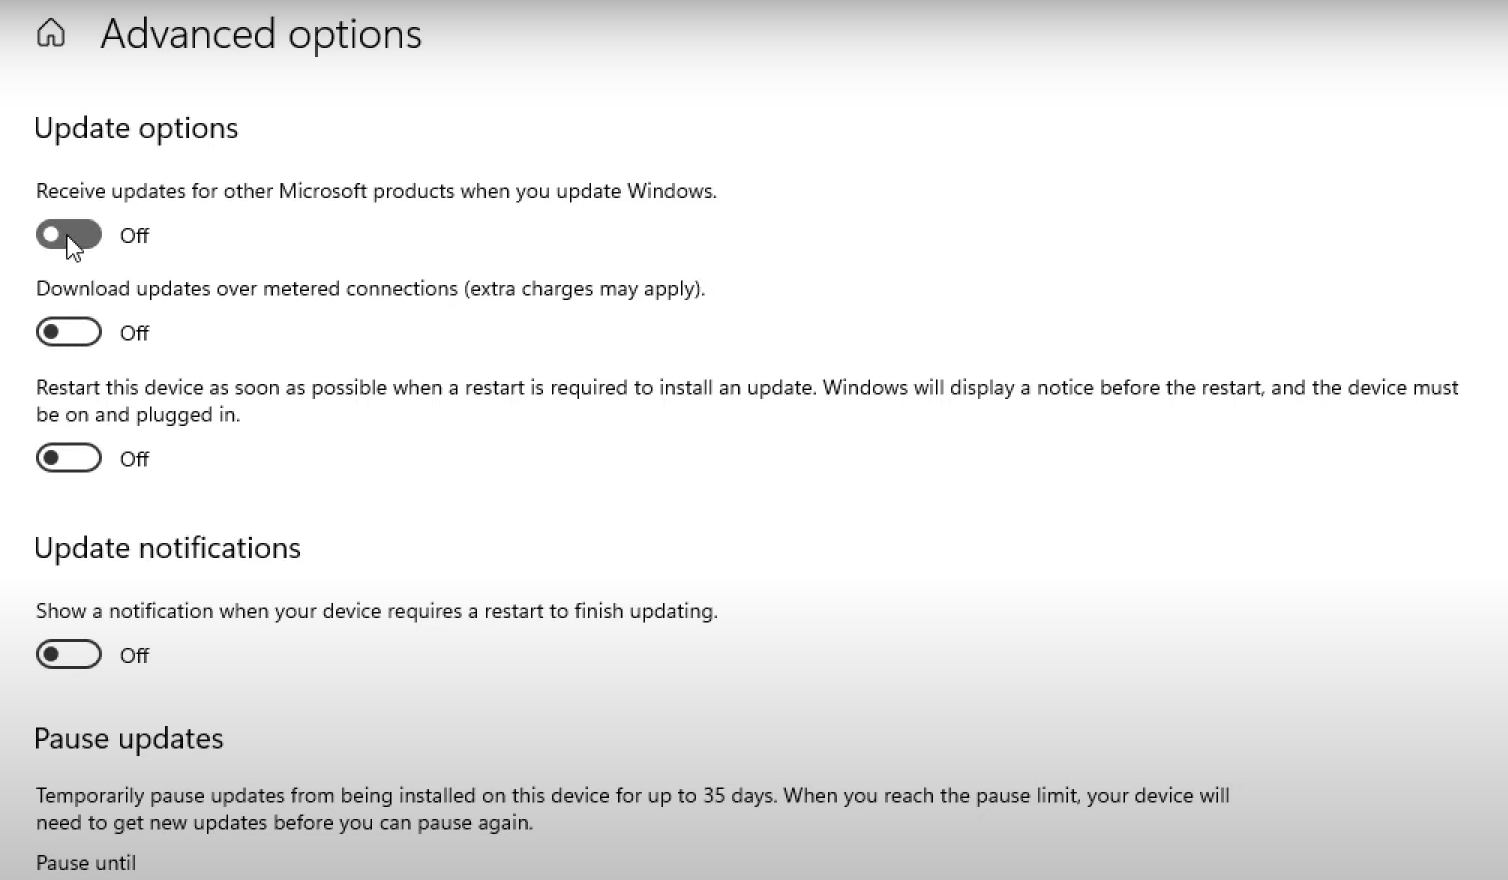
- Now, Turn on the ‘Recieve updates for other Microsoft products when you update Windows’.
In the next step,
- Click on File Explorer and then click on This PC.

- Select the Local Drive C and then open windows folder.
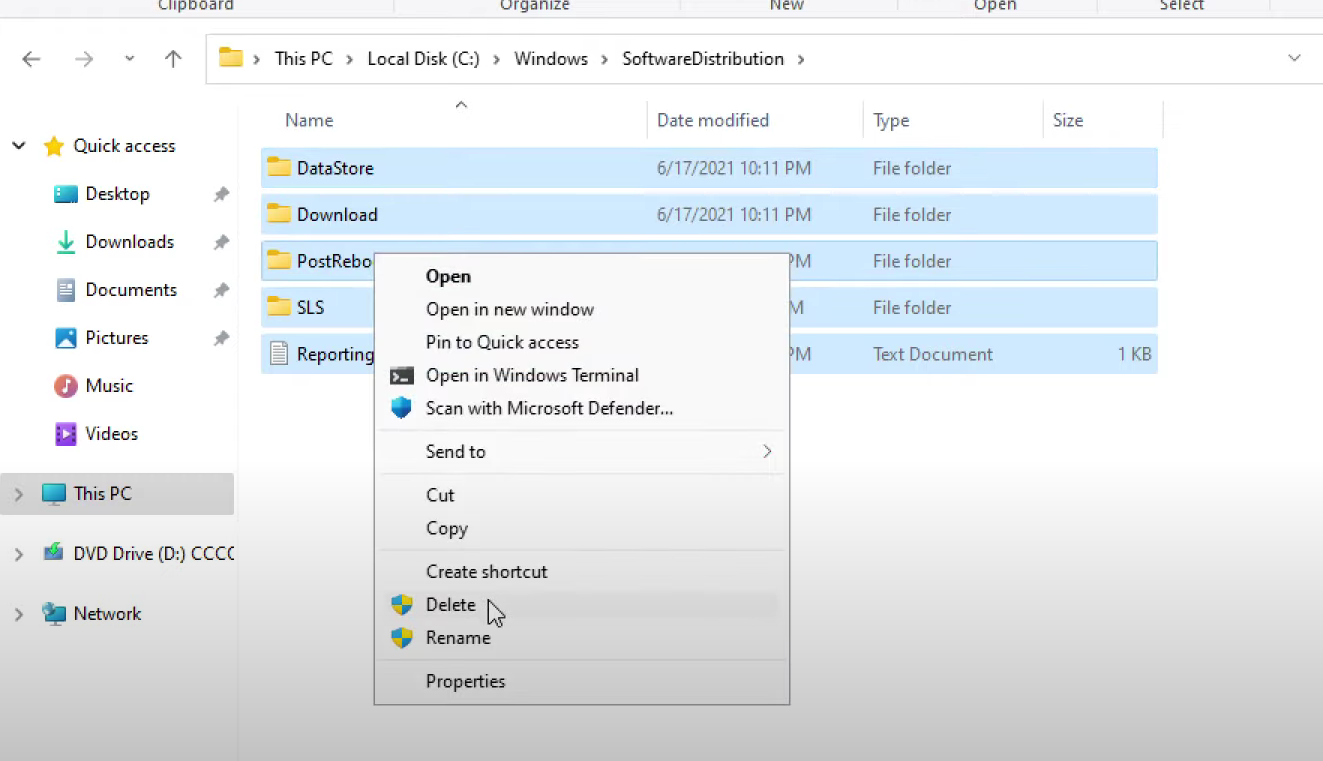
- Now search Software Distribution.
- Open it and select all the files within it and right click on it, then press on delete.
- Restart your window.
We hope that by following any one of the steps or all of them your issue will be solved.
Here, the given steps can be used by Windows 10, Windows 8 and Windows 7 users. This will definitely work as they are already tested methods.
You can also visit and get support from the Microsoft itself. https://support.microsoft.com/en-us/windows/get-help-with-windows-upgrade-and-installation-errors-ea144c24-513d-a60e-40df-31ff78b3158a
If steps provided here cannot fix the Windows 11 Update Problems, feel free to Contact Us. We will try our best to help you out.