System Restore is not working in Windows 10. What should I do?
System Restore feature is a very useful feature in the Windows operating system that can be a real life-saver at times. Though sometimes users may face the issue of System Restore not working. However, users may face issues like (a) System Restore points are not being created, even automatically, (b) unable to create a system restore points manually or (c) System Restore failed & did not complete successfully, and you are unable to restore your computer.
Pop up Errors for System Restore not working: –
- System Restore failed.
- System Restore did not complete successfully
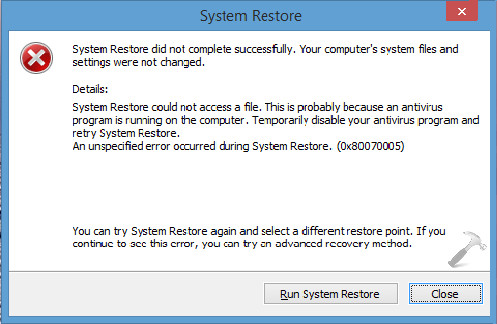
- Error 0x80070005: System Restore could not access the file. Temporary disable your antivirus program and try again.
- A shadow copy could not be created for the following reason. The writer experienced a transient error (0x800423F3)
- System Restore did not complete successfully. Your computer’s system files and setting were not changed.
- Can’t system restore, file or directory is corrupted and unreadable (0x80070570)
- System Restore failed to extract the original copy of the directory from the restore point.
Error detected in the Volume Shadow Copy Services (VSS).
Before proceeding to the methods, ensure that:-
- Disable your antivirus or security software and then try to create a system restore point.
- Ensure sufficient disk space on all the drives for enabling System Restore.
- Make sure that System Restore is enabled on the drives where you want System Restore enabled. Right-click on Computer > Properties > System Protection. Now check Protection settings. You need at least 300 MB of free space on each hard disk to create a system restore point that has System Protection turned on.
Method 1: -Run System Restore from Safe Mode to fix System Restore not working : –
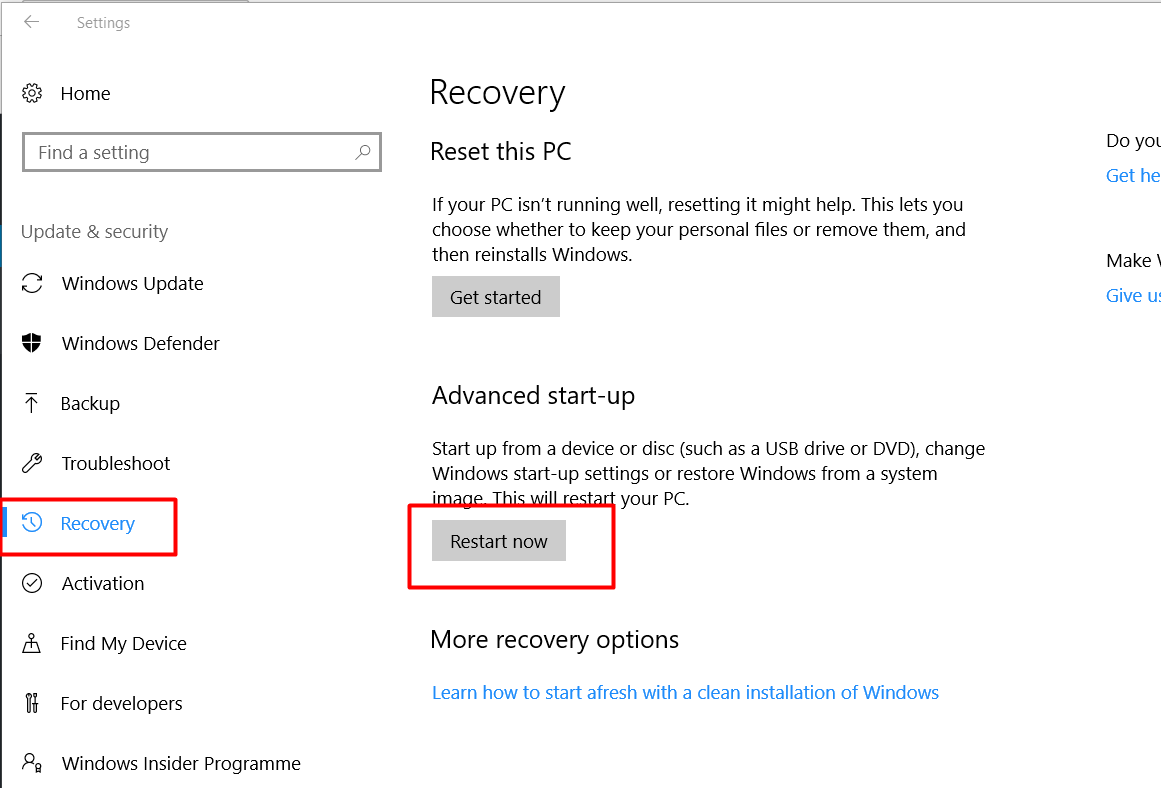
Step 1) Go to windows settings and choose Update and Security.
2: – Click on Recovery and Select Restart Now. Wait for a few seconds.
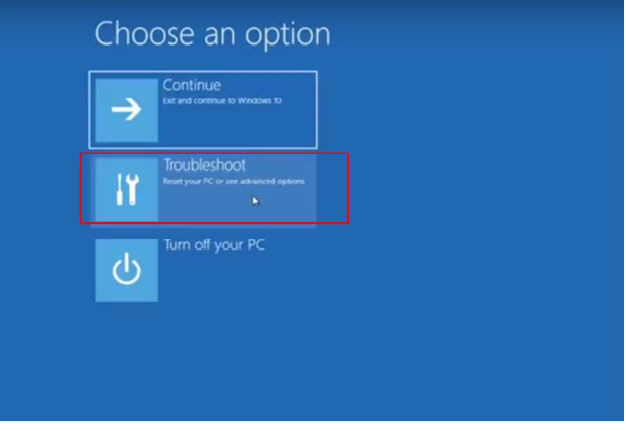
Step 3: – Now click on Troubleshoot.
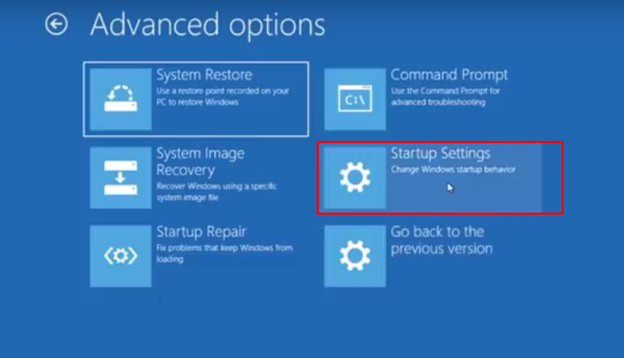
4: – Go to Advanced Options.
5: – Select Startup Settings.
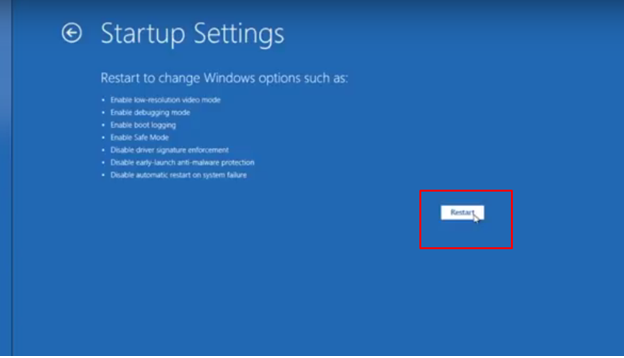
6: –Click on Restart and wait for a few seconds.
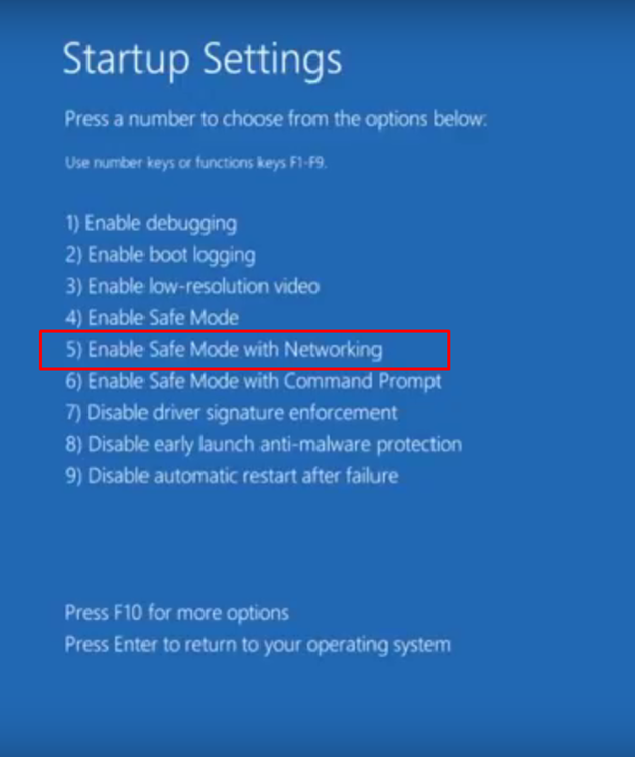
7: –Select Enable Safe Mode with Networking. And windows will start in Safe Mode now.
Method 2: -Configure Disk Space Usage to fix System Restore not working
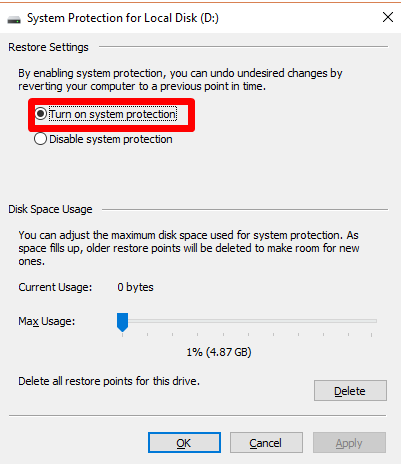
Step 1)-Type system protection into the Start Menu search bar, and select Create a system restore point. Select Configure. Check your Disk Space Usage, and increase if it is less than or equal to 300 MB. Click on Apply and OK.
2)-Furthermore, clear out old System Restore points. Type disk clean into the Start Menu search bar. Right-click the best match, and select Run as administrator. Select C: or the drive you’d like to clean up, then press OK. Disk Cleanup will calculate the amount of space available for cleaning.
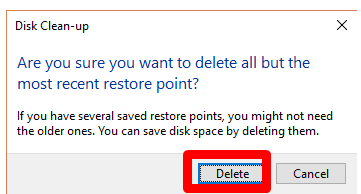
Open the More Options tab. Under System Restore and Shadow Copies, select Clean-up. You will get the following message:-
Press Delete Tab to delete everything.This method will keep your last System Restore point in that disk, whereas hitting Delete on the System Protection panel will eliminate all of them.
Method 3. Ensuring the creation of System Restore Points.
This will not resolve your issue totally but help you a lot in this problem.
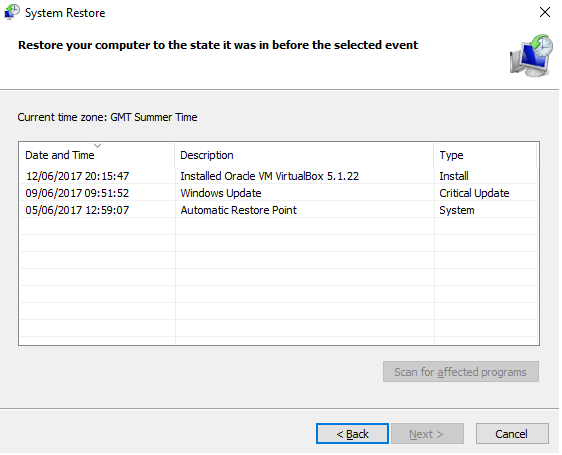
Turn on System Restore Points and you must regularly create them. You can check System Restore points are on and created automatically; by entering rstrui in the Start Menu search bar and selecting the corresponding entry. Press Next when prompted. You’ll be able to see a list of current System Restore points.
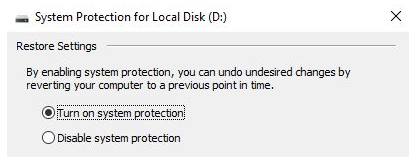
If nothing is there you’ll need to go back to the System Protection options used earlier. Type system protection in Start Menu search bar and select Create a system restore point. Select Configure. Check the turn on system protection Under Restore Settings.
Even if the problem of System Restore not working is still unsolved, you can contact us:-
Or

